 |
| MSR stove. |
1. WATER FILTER
Plans for rendering water safe to
drink rank top priority when preparing for back country dining. Your first stop
for drinking water safety guidance, the Center for Disease Control (CDC),
provides excellent direction on their drinking water safety fact sheet. Check out its convenient page at a glance format.
Do you lean towards frugality? Me too. Married to a gear junkie, I totally understand gear sticker shock. That said, please don't skimp when it comes to water safety. Study the CDC recommendations and prepare for an alternate method. Boiling water kills pathogens. If you choose to boil, you'll want bring extra containers, and plan for extra time into your itinerary for boiling and cooling water.
Personally, I've found it
challenging to keep an ample amount of safe water boiled and available when
needed for just myself. I can’t imagine boiling for a group. Boiling also does not remove particles. Chemical tablets provide an alternate method for killing
pathogens, assuming you don’t mind drinking chemicals.
As a single backpacker, I carried a lightweight hand-pumped filter. Inexpensive but slow, it required setting aside at least an hour to fill a couple liters. At my husband's request, I purchased a 0.02 micron gravity filtration system capable of filtering 4 liters at a time for our family. It's capable of removing bacteria, viruses, and the like for clean, safe drinking and cooking water. In the Boundary Waters, we gathered water from the center of the lake and didn't take surface water. The water felt cool and tasted good.
In addition to our filter, we brought water containers to the Boundary Waters. This included a water bottle for each member of the group. We also brought a spare water bag for holding an additional supply of filtered water.
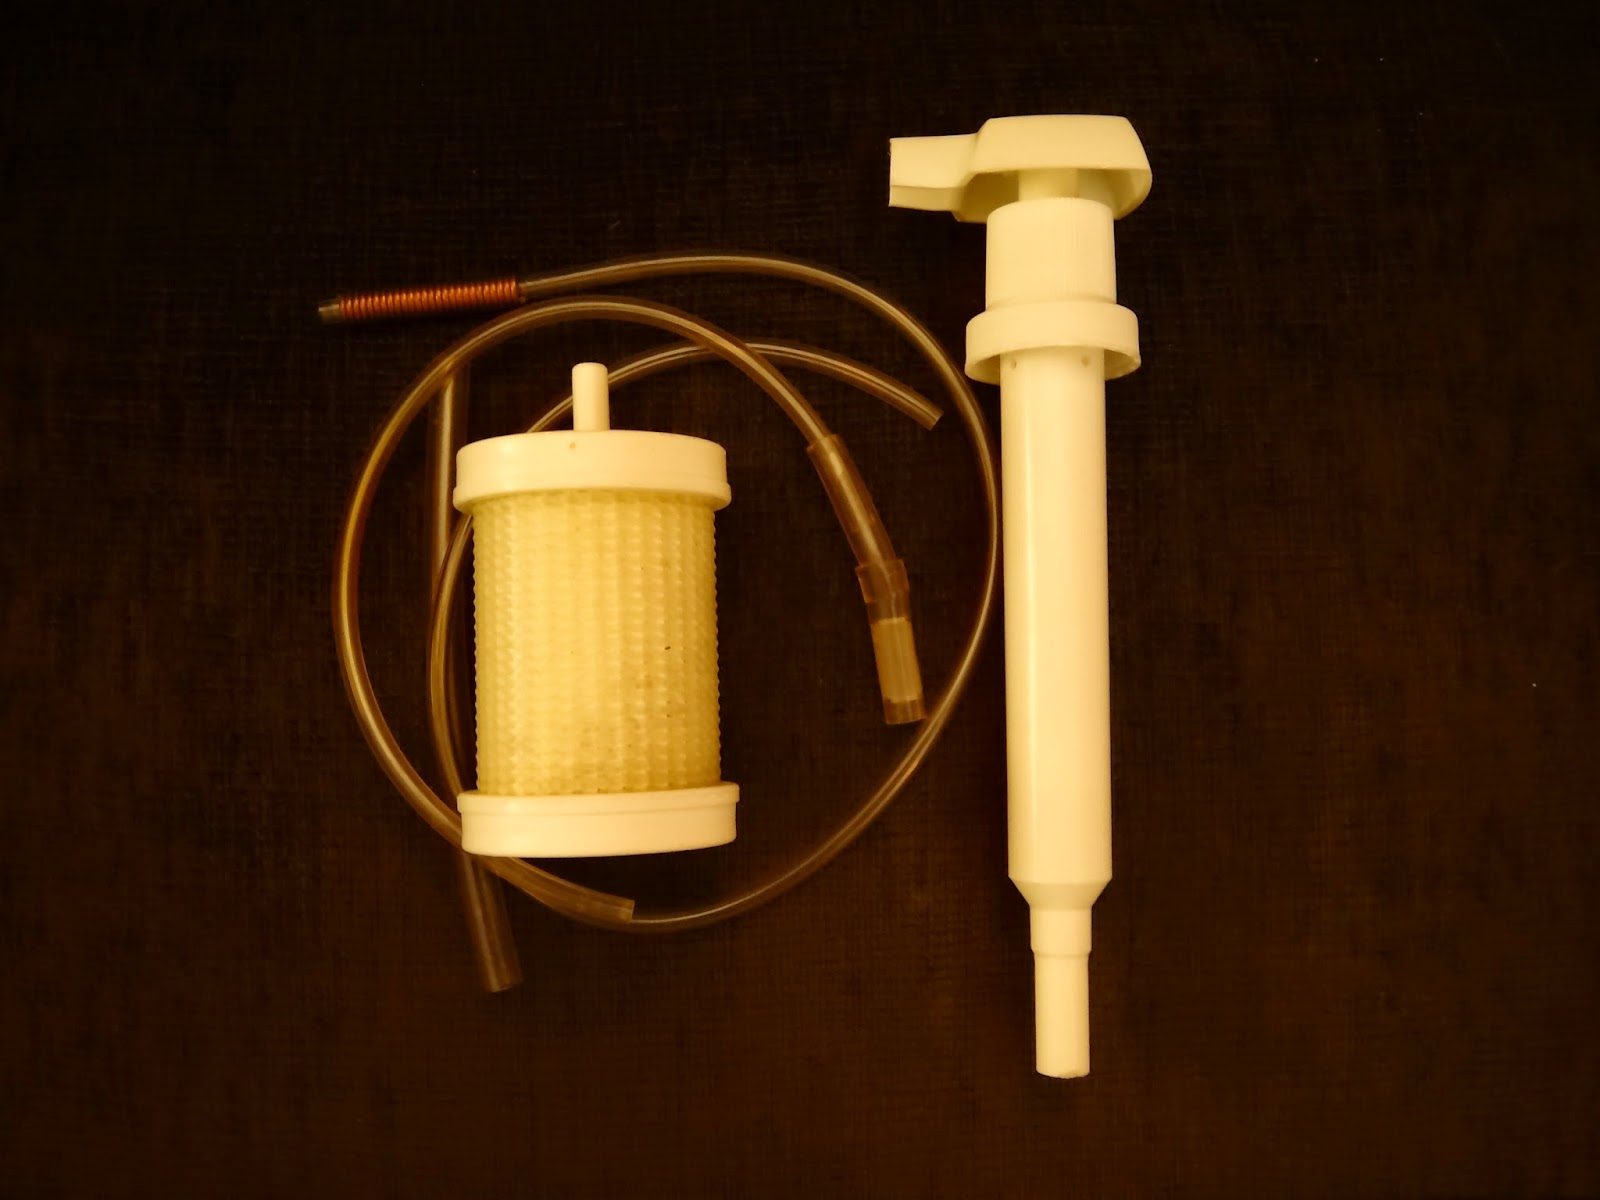 |
| My old pump style filter. |
As a single backpacker, I carried a lightweight hand-pumped filter. Inexpensive but slow, it required setting aside at least an hour to fill a couple liters. At my husband's request, I purchased a 0.02 micron gravity filtration system capable of filtering 4 liters at a time for our family. It's capable of removing bacteria, viruses, and the like for clean, safe drinking and cooking water. In the Boundary Waters, we gathered water from the center of the lake and didn't take surface water. The water felt cool and tasted good.
In addition to our filter, we brought water containers to the Boundary Waters. This included a water bottle for each member of the group. We also brought a spare water bag for holding an additional supply of filtered water.
2. CAMP STOVE
Camp kitchen essential number two is a camp stove (i.e. a
gas burner) along with an ignition source. For ignition, I use a lighter backed up by
waterproof matches in a small baggie. The stove I used on our Boundary Waters trip is a cheapie. It’s not as
lightweight as it could be. Purchased in the 1990s for around $12, it still burns
strong. Although I spent the last 20 years coveting lighter weight, compact
backpacking stoves, the reliability of old cheapie, along with the
availability and inexpensiveness of propane, kept me from upgrading.
 |
| Camp stove. |
In the past, I backpacked with a tiny emergency stove fueled by little fuel tablets. It was good for boiling a cup or two of water at a time, but nothing more. I paid $4.99 for the stove with starter fuel tablets. It weighs 8.5 ounces. As a single backpacker on a budget I squeaked by with it. But cooking (as opposed to boiling a cup of water) for a family, I need a gas burner.
I do have friends who prefer to cook over a campfire. Fire
cooking assumes no fire bans, abundant dry wood, and skill enough to maintain a
good cooking fire even in heavy winds and rain. This also means carrying the
proper cookware for fire-cooking. Fire worthy skillets and pots are often heavier
and bulkier than the lightweight pots used for gas stoves.
 |
| My old tablet burner. |
Update 10/01/14: With a birthday gift certificate for REI burning a hole in his pocket, my husband bought a light weight MSR backpacking stove. We're looking forward to the lighter weight on future trips.
We've used the MSR stove on a couple short trips. It is so compact and light, I regret not getting it sooner. Like most people, we budget for things and do what we can. The time with heavier makes us appreciate the lightweight stove that much more. I didn't have it for our 2014 boundary waters trip, but you can bet it's coming with us in the future. A nice feature of the MSI stove is that it takes smaller gas canisters. One gas canister fits nicely inside my GSI camp cookware set if I reconfigure the packing of the bowls.
3. DISHES & COOKWARE
 |
| GSI set (green utensils are not part of set). |
Dishes, utensils, and a pot with a cozy (for rehydrating
dehydrated foods) round out the camp kitchen gear bag. I love the nested set of
GSI pots, dishes, and utensils my husband talked me into purchasing at REI last
year. It nests efficiently into the bag that doubles as a sink.
Since there is always at least one child in camp, I love the way the short,
flat cups resist toppling over. The set proves durable and easy to clean. I
carry a tiny bottle of biodegradable camp soap that we refill at home from a
master container for cleaning.
Utensils, kept to a minimum, include plastic sporks, a
wooden spoon (to prevent scratching PTFE lined pans), tongs, a knife, and a
spatula for scraping up every last morsel. We do carry one spare utensil, as
we’ve learned plastic camp sporks like to break. For cleanup, I bring a small
spatula for scraping and a sponge for dish washing. I continue to seek a better
solution than the sponge for dish washing. If you have tips on this, I’d LOVE to
hear them.
 |
| Pot and skillet set with cozy. |
On this trip, we brought a set containing a second pot and a skillet. There
was space enough in our food barrel, and all of our planned portages were less
than a mile each. Hence, my luxury on this trip (in addition to M&Ms), was to have an extra pot. This allowed me to cook veggies and a main dish in separate pots and keep one warm in the cozy while waiting or the other to cook.
I stuffed vacuum sealed toilet paper along with the pot handler inside the pot and skillet (which doubles as a lid). The toilet paper protected the PTFE pot coating from scratches (prevented the pot handler from rattling around).
I stuffed vacuum sealed toilet paper along with the pot handler inside the pot and skillet (which doubles as a lid). The toilet paper protected the PTFE pot coating from scratches (prevented the pot handler from rattling around).
4. THE POT COZY
If you dehydrate foods, or even cook prepackaged pasta
dishes, a pot cozy is helpful for conserving fuel while supporting the hydration process. A cozy may be purchased, or you can make your own. Many cozy
making tutorials exist. One such tutorial is posted on a blog I love called Winter Campers. Check out the link. It'll take you directly to the cozy instructions.
A pot cozy doesn’t weight much, and fits snugly around your
pot such that the space occupied in the pack is minimized. I love our cozy. It
prevents lengthy cook times, saving not only fuel, but the effort of scraping
and scrubbing burnt food from pot bottoms.
5. THE CLASSIC DEBATE, FOOD BAG VS. BARREL
No attempts to make claims in one direction or the other
will be made here. I do not have the perfect solution to the age old argument,
hanging food bags or packs versus sealing food into canisters or barrels. Personally, I
believe that if a bear becomes habituated by experience dining from a food bag
or barrel, the bear will find its way into the next bag or barrel it
encounters. As far as scents attracting bears, some people say scents will be less likely to
attract bears when a sealed canister or barrel is used.
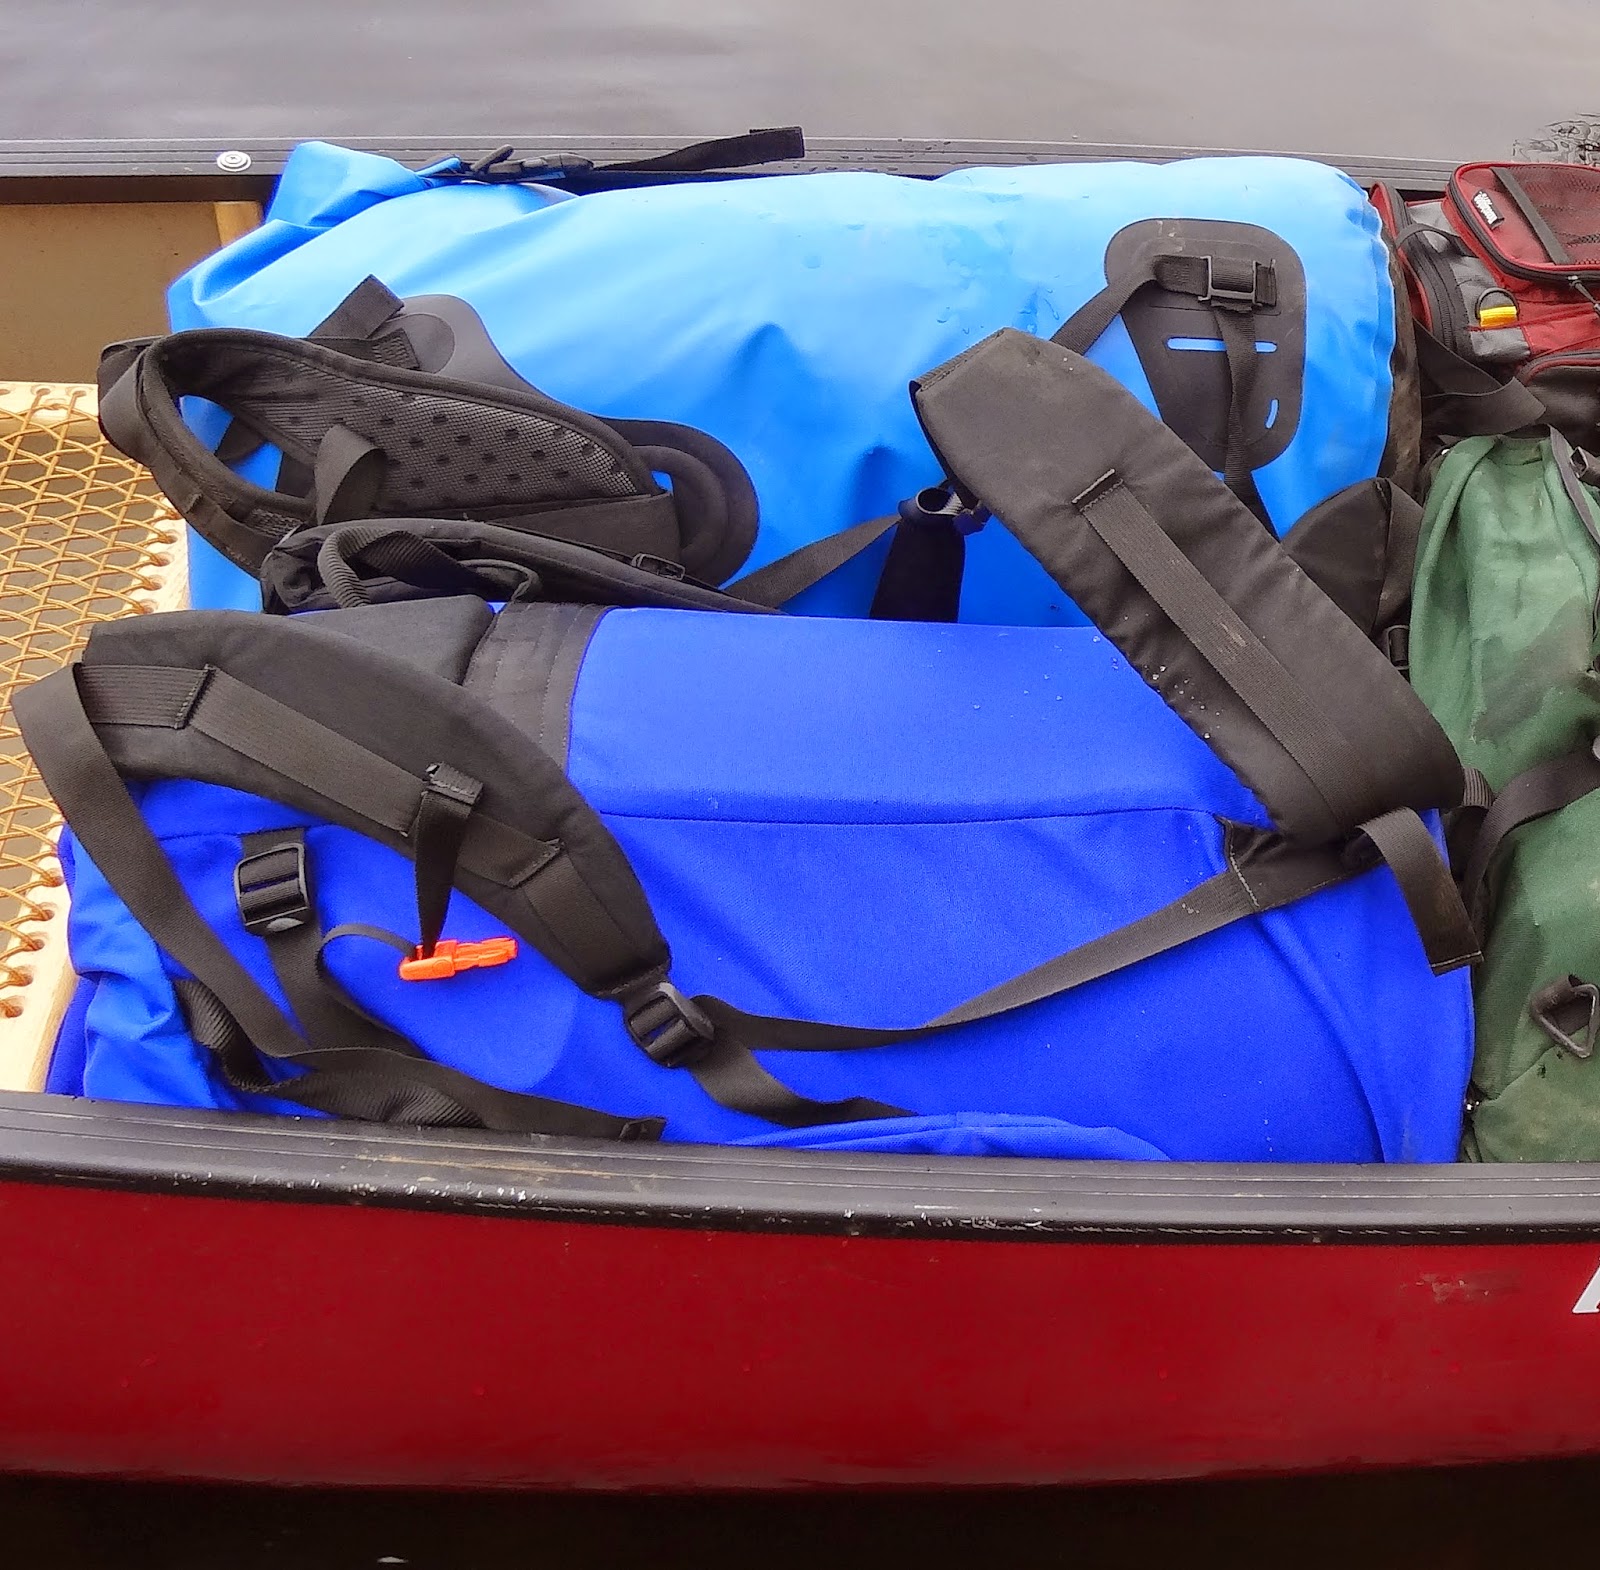 |
| Barrel nestled into carrying pack (front). |
In addition to food, I also pack all of our kitchen gear into the barrel. This
includes pots, dishes, utensils, camp soap, a lighter, camp stove, backup waterproof
matches, baggies, our trash bag, and so on. Our hygiene products, such as
toothpaste and toothbrushes, as well as our toilet paper also go into the
barrel. Since we pull out the inner core and vacuum seal the toilet paper to
make it compact (my husband’s excellent idea), it fills the space inside our
pots protecting the PTFE coating quite nicely.
6. BAGGIES
That’s right, baggies large and small. Your lightweight, inexpensive friend. Doubled up
two gallon baggies make great trash bags. Baggies allow one to move food from
bulky packaging into a more compact form. Baggies allow you to keep food and
gear organized. They help separate wet clothes from dry. Baggies can even
save your pocket from collecting sticky goo if you can’t finish your Clif bar.
I find I can never have enough baggies in camp.
7. EXTRAS
In addition to food, stove, and cookware, there are two
other handy items I like to pack when using the food barrel. These are a thin, flexible
cutting board, and a small plastic table cloth. The flexible cutting
board is super lightweight and conforms to the sides of the barrel. It provides
a safe surface for cutting food, as opposed to trying to hold and cut
simultaneously. It also provides a clean, flexible surface for serving food,
and for catching food while doing tasks such as hand shredding cheese.
The small plastic table cloth acts as my kitchen
counter in the back country. Since I don’t carry a camp table, I spread the small table cloth folded down to half size on the ground beneath our rain
tarp. It allows me a clean place to unload the contents of my food barrel, let
dishes dry, or work on meals.
I've seen people bring camp tables canoe camping. Although it seems mighty convenient, I do not bring one. I'd rather not invest the money, and I'd rather not portage a table. Although my cutting board and table cloth don’t make the cut for backpacking, they are light weight enough that they work perfectly in our food barrel for canoe trips.
I've seen people bring camp tables canoe camping. Although it seems mighty convenient, I do not bring one. I'd rather not invest the money, and I'd rather not portage a table. Although my cutting board and table cloth don’t make the cut for backpacking, they are light weight enough that they work perfectly in our food barrel for canoe trips.
“GEAR” FOR YOUR HOME KITCHEN
 |
| Vacuum sealer (rear) and food dehydrator (front). |
Interested in more? Check out Easy Backpacking Recipes,
which summarizes the recipes we used for our 2014 Boundary Waters trip. Wondering
what low cost, prepackaged foods can you pack? Check out my Tips on 11 Easy, Lightweight, and Inexpensive Prepackaged Foods from the Grocery Store for Backpacking and Paddling Expeditions.
Please
share your experiences with camp kitchen gear. What do you bring along for washing dishes in camp? Any
suggestions on which model lightweight camp stove should consider purchasing?
I’d
love to hear from you. Please comment below…
A perfect list, thank you for sharing these detailed and useful information
ReplyDeleteHi Lauren, Thanks for stopping by. I'm continually improving my packing list each year to become a little more light weight. The lighter weight stove has been wonderful and I hemmed a 5 foot by 3 foot piece of nylon in place of the plastic table cloth. Those are my best upgrades!
Delete